Making your own bingo daubers at home is a fun, affordable project that anyone can tackle in under 30 minutes. Whether you need daubers for a classroom activity, a weekend bingo night, or a kids’ craft session, a DIY approach lets you customize colors, tip sizes, and ink types to suit your exact needs. Homemade daubers cost roughly $0.50 each compared to $1–$3 for store-bought versions, and the process is surprisingly simple once you know the right materials to use.
If you are new to daubers in general, our complete guide on how to use bingo daubers covers everything from grip techniques to ink care. This article focuses specifically on building your own daubers from scratch so you can save money and get creative at the same time.
Why Make Your Own Bingo Daubers?
There are several practical reasons to go the DIY route instead of buying daubers off the shelf:
- Cost savings – A single homemade dauber costs around $0.50 in materials, while retail daubers typically run $1–$3 each. If you need a set of 20 for a party or classroom, the savings add up fast.
- Color customization – Store-bought daubers come in limited color sets. When you mix your own ink, you can create any shade you want, including pastels, neons, and seasonal colors.
- Eco-friendly – Reusing squeeze bottles and sponge scraps keeps materials out of the landfill.
- Educational value – Kids learn basic engineering and color mixing when they build their own daubers.
- Creative control – You choose the tip size, ink consistency, and bottle shape, which means you can design daubers specifically for crafts, dot art, or traditional bingo play.
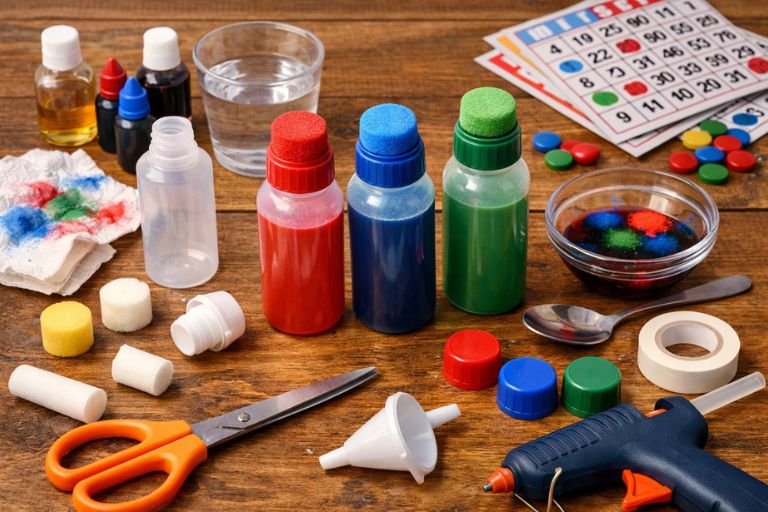
Materials You Will Need
Gather the following supplies before you start. Most of these are available at dollar stores, craft shops, or online retailers. If you are looking for pre-made options instead, check out our guide on where to buy bingo daubers for trusted sources.
Essential Materials
- Small squeeze bottles – 1 oz to 2 oz plastic bottles with narrow necks work best. Empty travel-size shampoo bottles, mini condiment bottles, or empty marker barrels are all good options.
- Foam pieces or sponges – Dense foam rounds (about ¾ inch in diameter) serve as the daubing tip. You can cut these from a kitchen sponge, foam sheet, or purchase pre-cut foam circles at a craft store.
- Food coloring or washable paint – Standard liquid food coloring mixed with water is the easiest ink option. Washable tempera paint diluted with a small amount of water also works well.
- Water – Tap water is fine for mixing ink.
Optional Materials
- Fine craft glitter – Adds sparkle to the ink for party daubers.
- Craft glue or hot glue – Secures the foam tip to the bottle opening.
- Rubber bands – An alternative to glue for holding the foam in place.
- Small funnel or syringe – Makes filling the bottles cleaner and faster.
- Paper towels – For cleanup and testing dabs.
Step-by-Step Instructions
Step 1: Prepare the Bottle

Clean your squeeze bottle thoroughly with warm soapy water and let it dry completely. Any residue inside the bottle can affect ink color and consistency. If you are using an empty marker barrel, remove the old felt insert and rinse until the water runs clear.
Step 2: Cut the Foam Tip
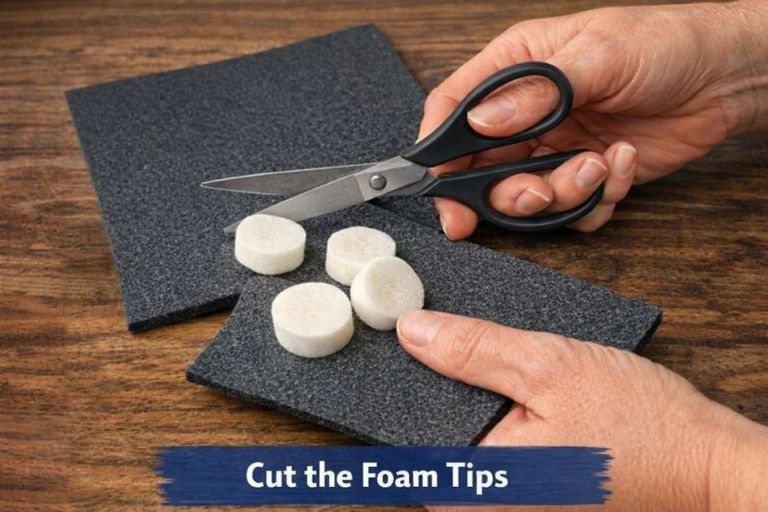
Cut a piece of dense foam into a circle slightly wider than the bottle opening. For a standard dauber-sized dot, aim for a tip diameter of about ¾ inch to 1 inch. The foam should be roughly ½ inch thick. Dense foam produces cleaner dots, while soft, airy sponge material tends to leave streaky marks.
Step 3: Mix the Ink
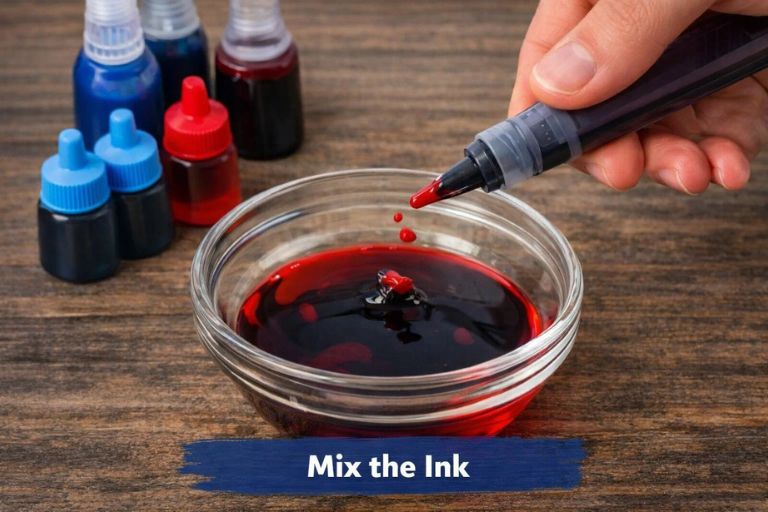
In a small bowl, combine your coloring agent with water. A good starting ratio is:
- Food coloring: 15–20 drops of food coloring per 1 oz of water.
- Washable paint: 2 parts paint to 1 part water, stirred until smooth.
The ink should flow freely but still leave a solid, opaque mark. If it is too thin, the dots will be pale and watery. If it is too thick, the ink will not travel through the foam properly.
Step 4: Fill the Bottle
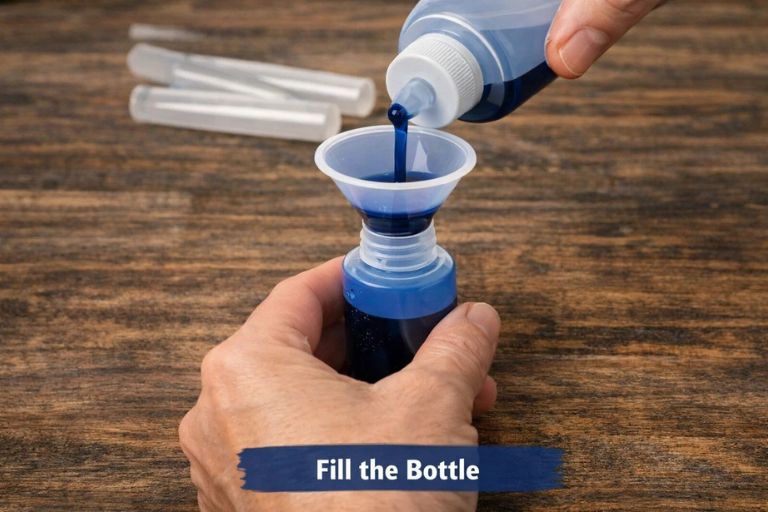
Use a small funnel or syringe to pour the ink mixture into the squeeze bottle. Fill it about three-quarters full to leave room for air, which helps push the ink toward the tip when you squeeze.
Step 5: Attach the Foam Tip
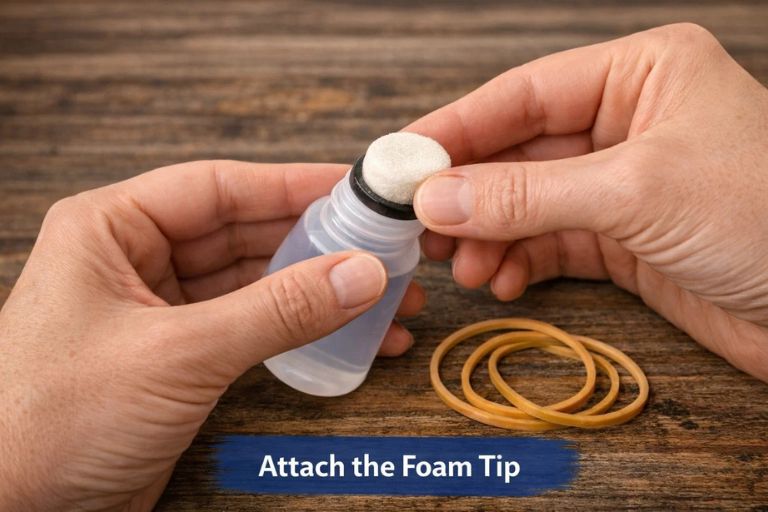
Press the foam circle firmly into the bottle opening. If the fit is snug, friction alone may hold it in place. For a more secure attachment, apply a thin ring of hot glue or craft glue around the inside edge of the opening before inserting the foam. Alternatively, wrap a rubber band tightly around the foam and bottle neck.
Step 6: Prime and Test
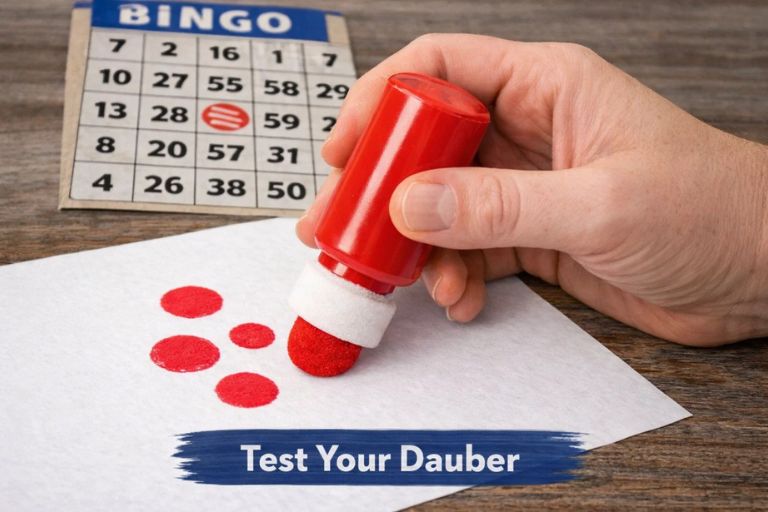
Hold the dauber tip-down and gently squeeze the bottle until you see ink saturate the foam. This priming step usually takes 5–10 gentle squeezes. Once the foam is wet, press it onto a piece of scrap paper to test the dot quality. Adjust ink thickness or foam density as needed.
Tips for Best Results
Foam density matters more than anything else. The single biggest factor in dot quality is the foam you choose. High-density craft foam or fine-pore sponge material produces clean, round dots. Low-density bath sponge material creates blotchy, uneven marks. If your local craft store sells foam sheets, cut your tips from those.
Ink consistency is the second priority. The ink needs to be thin enough to wick through foam but thick enough to leave a visible mark. Test on scrap paper and adjust by adding more water (to thin) or more coloring (to thicken).
Store daubers tip-up when not in use. This prevents ink from pooling at the tip and leaking. If you plan to store them for more than a day, cap the tip with a small piece of plastic wrap held by a rubber band.
Label your colors. Once you have a set of daubers, use a permanent marker to write the color name on each bottle so kids can find the right one quickly.
Kid-Friendly Version
For younger children (ages 3–6), simplify the project:
- Use larger squeeze bottles that are easier to grip, such as 3 oz travel bottles.
- Pre-cut the foam tips so kids do not need scissors.
- Use washable paint instead of food coloring to make cleanup easier.
- Let kids mix their own colors by combining primary paint colors with water in a bowl before funneling the mixture into bottles.
- Skip the glue step and use rubber bands so kids can swap foam tips.
This version works great as a guided classroom activity or a rainy-day project. Kids enjoy the process of building the tool almost as much as using it.
Homemade vs. Store-Bought Daubers
Here is an honest comparison so you know what to expect:
- Dot consistency: Store-bought daubers produce perfectly uniform dots because the foam tips are machine-cut and factory-primed. Homemade daubers may have slight variations in dot size and saturation, especially on the first few uses.
- Ink longevity: Commercial dauber ink contains preservatives and binders that help it last longer on paper without fading. DIY ink made from food coloring may fade over time, though washable paint holds up better.
- Durability: A well-made homemade dauber can last through several bingo sessions or craft projects. Commercial daubers are built to last for months of regular use.
- Cost: Homemade daubers win here easily. At roughly $0.50 per dauber versus $1–$3 retail, DIY is the budget-friendly choice for large groups.
For a deeper look at commercial options and what separates a quality dauber from a cheap one, read our overview of what bingo daubers are and how they work.
Best Uses for Homemade Bingo Daubers
DIY daubers shine in specific situations:
- Classroom activities: Teachers can make a class set of 25–30 daubers for under $15 and let students use them for dot-to-dot worksheets, letter recognition, and counting exercises.
- Party favors: Custom-colored daubers make fun take-home gifts at bingo-themed birthday parties.
- Craft projects: Dot art, stamping patterns, and abstract painting all work well with homemade daubers.
- Temporary use: If you only need daubers for a single event, DIY saves you from buying a product you will not use again.
Cost Comparison Breakdown
Here is what a set of 10 homemade daubers costs versus buying retail:
- DIY (10 daubers): Squeeze bottles ($3 for a pack of 10), foam sheet ($1), food coloring ($2), rubber bands ($1). Total: approximately $7, or $0.70 per dauber.
- Store-bought (10 daubers): $10–$25 depending on brand and retailer.
The savings become even more dramatic at larger quantities because the foam and food coloring stretch further.
Frequently Asked Questions
What kind of ink works best for homemade bingo daubers?
Washable tempera paint diluted with a small amount of water is the best all-around choice. It produces vibrant, opaque dots, cleans up easily, and does not stain skin or clothing as much as food coloring. If you prefer food coloring, add a drop of dish soap to the mixture to help it flow through the foam more evenly.
How long do DIY bingo daubers last?
A well-constructed homemade dauber with a secure foam tip and properly mixed ink can last through 3–5 bingo sessions or craft projects before the foam wears down or the ink runs out. You can extend the lifespan by replacing the foam tip and refilling the ink as needed.
Can I make daubers with permanent ink instead of washable ink?
Yes, but proceed with caution. Permanent ink such as alcohol-based ink or acrylic paint will not wash out of clothing or off skin easily. These inks work well for adult craft projects where permanence is desired, but they are not recommended for children or for traditional bingo games played on reusable cards.
What is the best foam material for dauber tips?
High-density craft foam sheets (often sold as EVA foam) produce the cleanest dots. You can also use the dense side of a dual-texture kitchen sponge. Avoid bath sponges, cotton balls, or loosely woven fabric, as these materials create messy, inconsistent marks.
Can kids make these daubers safely?
Absolutely. With adult supervision for the cutting and gluing steps, children ages 5 and up can handle most of the assembly. Use washable paint, child-safe scissors, and skip the hot glue in favor of rubber bands for a fully kid-safe build.
Wrapping Up
Building your own bingo daubers is a straightforward project that saves money and opens the door to creative customization. The key to a great homemade dauber is dense foam, properly mixed ink, and a secure tip attachment. Once you have your daubers ready, head over to our guide on how to use bingo daubers for tips on grip, pressure, and getting the most out of every game or craft session.