Glitter bingo daubers add a sparkle effect to every dab, making them a favorite for kids’ parties, themed events, and creative craft projects. The shimmer comes from fine glitter suspended in the ink, and when the dauber presses against paper, it leaves a colorful dot flecked with tiny reflective particles. You can buy glitter daubers pre-made, but making your own gives you full control over the color, glitter intensity, and ink type.
This tutorial shows you how to add glitter to an existing dauber and how to build a glitter dauber from scratch. If you are new to using daubers in general, start with our guide on how to use bingo daubers for the fundamentals of grip, pressure, and ink management before diving into this project.
What Makes Glitter Daubers Special?
Standard bingo daubers leave a clean, solid-colored dot. Glitter daubers do the same thing, but with an added sparkle that catches the light. This effect makes them popular for several reasons:
- Visual appeal – Glitter dots stand out on paper and add a festive look to bingo cards, worksheets, and craft projects.
- Kid-friendly excitement – Children are naturally drawn to sparkly things. Glitter daubers turn a simple activity into something that feels special and engaging.
- Event theming – Gold and silver glitter daubers fit perfectly at New Year’s parties. Red and green glitter works for holiday bingo. Pastels are great for baby showers and spring events.
- Craft versatility – Glitter daubers produce a textured, dimensional effect that is hard to replicate with plain markers or crayons, making them useful for dot art, card making, and scrapbooking.
If you want to learn more about the different types of daubers available and how they differ, our overview of what bingo daubers are is a good starting point.
Materials Needed
The materials you need depend on whether you are adding glitter to an existing dauber or building one from scratch. Here is a complete list for both approaches:
For Adding Glitter to an Existing Dauber
- A standard bingo dauber – Any brand with a removable tip works. Twist-top daubers are the easiest to open.
- Fine craft glitter (polyester-based) – This is the most important material choice. You need ultra-fine or extra-fine glitter, typically labeled as 1/128 inch or 0.008 inch particle size. Polyester glitter is waterproof and will not dissolve in the ink.
- Small stirring stick or toothpick – For mixing glitter into the ink inside the barrel.
- Paper towels – For cleanup and testing.
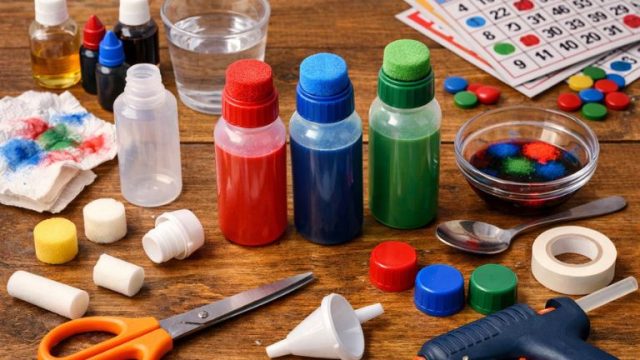
For Making a Glitter Dauber from Scratch
- Small squeeze bottle – 1 oz to 2 oz plastic bottle with a narrow neck.
- Dense foam circles – ¾ inch to 1 inch diameter, about ½ inch thick.
- Fine craft glitter (polyester-based) – Same specifications as above.
- Washable ink or food coloring + water – Washable tempera paint thinned with water works well. Food coloring mixed with water is another option.
- Clear school glue (optional) – Adding a small amount of clear glue to the ink mixture helps suspend the glitter particles more evenly so they do not all settle to the bottom.
- Small funnel or syringe – For filling the bottle cleanly.
- Hot glue or rubber band – To secure the foam tip to the bottle.
Method 1: Adding Glitter to an Existing Dauber
This is the faster and simpler approach. Start with a dauber you already own and upgrade it with glitter.
Step 1: Open the Dauber
Remove the tip assembly by twisting it counterclockwise (for twist-top models) or pulling it straight off (for press-fit models). Work over paper towels to catch any drips. Set the tip aside.
Step 2: Add Glitter to the Ink Reservoir
Pour approximately ¼ teaspoon of fine polyester glitter directly into the ink barrel. For a standard ½ oz dauber, this amount provides a noticeable sparkle without clogging the foam tip. If you want heavier glitter coverage, you can add up to ½ teaspoon, but more than that risks blocking ink flow.
Step 3: Mix Thoroughly
Insert a toothpick or thin stirring stick into the barrel and stir the ink and glitter together for 15–20 seconds. The goal is to distribute the glitter particles evenly throughout the liquid. If the ink level is low, consider topping it off with matching refill ink or a diluted washable paint to give the glitter more liquid to float in.
Step 4: Reassemble and Shake
Press or screw the tip back onto the barrel securely. Turn the dauber upside down and shake it vigorously for 10 seconds to further mix the glitter. This shaking step is something you should repeat before every use, since glitter naturally settles to the bottom over time.
Step 5: Test
Dab onto scrap paper. You should see colored dots with visible glitter flecks throughout. If the glitter seems sparse, add more. If the dots are gritty or uneven, the glitter particles are too large—see the section on glitter types to avoid below.
Method 2: Making a Glitter Dauber from Scratch
If you do not have a store-bought dauber to modify, you can build a glitter dauber from basic supplies. This approach is ideal for creating custom party favors or classroom sets.
Step 1: Mix the Glitter Ink
In a small bowl, combine:
- 1 oz of washable tempera paint (your base color)
- ½ oz of water
- ¼ teaspoon of fine polyester glitter
- 1 teaspoon of clear school glue (optional, but recommended)
Stir everything together thoroughly. The clear glue acts as a suspension agent, keeping the glitter distributed more evenly in the liquid rather than sinking straight to the bottom. The mixture should be thin enough to flow freely but opaque enough to leave a solid mark.
Step 2: Fill the Bottle
Use a small funnel or syringe to transfer the glitter ink into your squeeze bottle. Fill to about three-quarters capacity, leaving an air pocket for squeeze pressure. Stir the bowl mixture frequently as you pour, since glitter settles fast.
Step 3: Attach the Foam Tip
Cut a dense foam circle to fit slightly wider than the bottle opening. Press it into the opening and secure it with hot glue around the edge or a tight rubber band. The foam should be snug enough that it does not pop out when you squeeze, but not so compressed that ink cannot flow through it.
Step 4: Prime and Test
Hold the dauber tip-down and squeeze gently 10–15 times until ink saturates the foam. Shake the dauber before the first use to mix the glitter. Test on scrap paper—you should see a colored dot with an even scattering of glitter particles. Adjust the ink-to-glitter ratio as needed.
Tips for Even Glitter Distribution
Getting glitter to distribute evenly in every single dab takes a bit of technique:
- Shake before every use. Glitter is heavier than ink and will always settle to the bottom of the barrel when the dauber sits idle. Give it a vigorous shake for 5–10 seconds before each session.
- Use only fine glitter. Ultra-fine glitter (1/128 inch) flows through foam smoothly. Anything coarser gets trapped and creates clogs.
- Add clear glue to the mix. A small amount of clear school glue increases the viscosity of the ink just enough to slow glitter settling without making the ink too thick to dab. This is the single most effective trick for keeping glitter suspended.
- Do not overfill with glitter. More is not better. Too much glitter makes the ink gritty, clogs the foam, and produces rough-textured dots. Start with ¼ teaspoon per ½ oz of ink and increase gradually if you want more sparkle.
- Store tip-down between uses. Unlike regular daubers that store best tip-up, glitter daubers benefit from being stored tip-down for a few minutes before use. This lets glitter migrate toward the foam, so your first dabs have plenty of sparkle. But do not store them tip-down long term, as this can cause leaking.
Glitter Types to Avoid
The type of glitter you choose can make or break your glitter dauber. Here is what to steer clear of:
- Chunky or large-flake glitter: Anything marketed as “chunky,” “hexagonal,” or larger than 1/64 inch will clog the foam tip within a few uses. The particles are simply too large to pass through the foam’s pores.
- Metallic craft glitter (non-polyester): Some cheap metallic glitters are made from metal-coated PET film that can rust or degrade in water-based ink, turning the ink murky and discoloring the glitter.
- Biodegradable glitter: While environmentally friendly, biodegradable glitter is designed to break down in water. It will dissolve in the ink over time, losing its sparkle and potentially turning into a gummy paste.
- Loose craft glitter from old stock: Glitter that has been exposed to humidity may clump together. Test a pinch in water first—if it clumps instead of dispersing, it will cause problems in your dauber.
Best Glitter Colors and Combinations
Part of the fun of making your own glitter daubers is choosing color combinations. Here are some popular pairings:
- Gold glitter + red ink: A rich, festive combination that works for holiday events and birthday parties.
- Silver glitter + blue ink: Clean and bright, perfect for winter-themed activities or boy-themed baby showers.
- Iridescent glitter + purple ink: Creates a magical, shifting sparkle effect that kids love.
- Pink glitter + pink ink: A monochrome sparkle look that is popular for princess-themed parties and Valentine’s Day crafts.
- Multi-color glitter + clear or white ink: Produces rainbow sparkle dots that work for any occasion.
- Green glitter + green ink: Great for St. Patrick’s Day bingo and nature-themed craft projects.
You can also mix two glitter colors together before adding them to the ink. For example, combining gold and silver glitter creates a champagne sparkle effect that looks elegant on invitations and greeting cards.
Best Uses for Glitter Bingo Daubers
Glitter daubers are not just for bingo. Here are the most popular ways people use them:
- Party favors: Make a set of 10–15 glitter daubers in theme-matching colors and include them in goodie bags. Kids love taking them home for creative play.
- Classroom rewards: Teachers can offer glitter daubers as a special treat for good behavior or completed assignments. Students use them for dot art worksheets and activity pages.
- Craft projects: Glitter daubers add dimension and texture to handmade cards, scrapbook pages, gift tags, and wrapping paper. The combination of color and sparkle creates effects that are hard to achieve with other tools.
- Themed bingo nights: Hosting a New Year’s Eve bingo game? Gold and silver glitter daubers set the mood. Running a Halloween event? Orange and black glitter daubers fit the theme perfectly.
- Sensory play: For young children, the tactile experience of squeezing a bottle and seeing sparkly dots appear is a satisfying sensory activity that builds hand strength and fine motor skills.
For more ideas on how to get daubers for events and activities, our guide on where to buy bingo daubers lists retailers that carry specialty and themed options.
Frequently Asked Questions
Will glitter clog my bingo dauber?
Not if you use the right type. Ultra-fine polyester glitter (1/128 inch particle size) flows through standard dauber foam tips without clogging. Chunky glitter, large hexagonal flakes, and biodegradable glitter will clog the tip and should be avoided. Stick with fine craft glitter and you will have no problems.
How much glitter should I add to a dauber?
Start with ¼ teaspoon of fine glitter per ½ oz of ink. This gives a noticeable sparkle without affecting ink flow. If you want heavier glitter coverage, increase to ½ teaspoon, but do not exceed that amount or you risk clogging the foam tip and making the dots feel gritty on paper.
Do I need to shake a glitter dauber before every use?
Yes. Glitter settles to the bottom of the ink reservoir within a few minutes of sitting still. A quick 5–10 second shake before each use redistributes the particles and ensures every dab has consistent sparkle. Adding a small amount of clear school glue to the ink slows the settling process but does not eliminate it entirely.
Can I add glitter to any brand of bingo dauber?
You can add glitter to any dauber with a removable tip. Twist-top daubers are the easiest to open and reassemble. Press-fit daubers work too but require more force to open. Sealed daubers can be modified by carefully prying the tip off, but there is a risk of damaging the seal. If you are unsure whether your dauber’s tip is removable, try gently twisting it first.
Is glitter dauber ink safe for kids?
As long as you use non-toxic washable ink and polyester craft glitter, the finished dauber is safe for children to use under supervision. Polyester glitter is the industry standard for children’s craft products because it is non-toxic, non-irritating, and does not have sharp edges. That said, glitter daubers are not intended for children under 3 due to the small-parts choking hazard of the dauber tip.
Conclusion
Making glitter bingo daubers is a quick, creative project that turns an ordinary dauber into something eye-catching and fun. The keys to success are using ultra-fine polyester glitter, mixing it thoroughly into the ink, and shaking the dauber before every use. Whether you upgrade an existing dauber or build one from scratch, the result is a sparkling tool that elevates any bingo game, classroom activity, or craft session. For more techniques on getting the best performance out of your daubers, visit our complete guide on how to use bingo daubers.